
User Tools
This is an old revision of the document!
Table of Contents
Comment: If you are here to “fix” the banner, just remove the 'lol' from the image name.. also delete this wrap

Goku Fleet
This fleet uses two different groups of damage dealers that often are shooting two different targets, harpies and stealth bombers. This is unusual, and in a way it's two fleets in one, so to facilitate this and make form ups easier and quicker, we have made all the stealth bomber fits have T2 torps, and require that only people with T2 torps fly the stealth bombers, while people without T2 torps fly the Harpies. This creates some natural division in our numbers that usually provides enough people for both damage groups, without having to force reship too many people (also, T2 torps are important to the concept for high anti-capital DPS and long range).
In conclusion, ship priority for this fleet in the MOTD will always start like this Hounds → Manticore/Nemesis → Harpy, which means pilots with T2 torps should fly the bomber over the Harpy. We can always reship bombers into Harpies if we need to balance the numbers, but it's harder to go the other way. Also, since the Manticore and Nemesis are the only two bombers with the bomb launcher, we ask that some people have both Hounds and Manticore/Nemesis ready, so that we can quickly reship people from Hounds to Manticore/Nemesis to have even bomber numbers.
DPS
Primary DPS
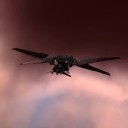
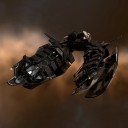
| Goku Hound (가장 선호됨) | |
|---|---|
 | - 프라이머리 쏘시면 됩니다. - FC의 지시에 따르면 됩니다. - 별도 지시가 없는 이상 Keep Range 2500m로 앵커하세요. -Bomb을 쏘고 난 뒤에 다시 앵커하는것 잊지마세요. |
Hound 가 선호되는 이유는 피팅이 가장 수월하며, Shrapnel Bomb과 Nova Torpedo가 사용되기 때문입니다.
하운드에는 Explosive 속성에 보너스가 붙어있으므로, Shrapnel Bomb과 Nova Torpedo와 같은 Explosive 데미지를 주는 플릿에 적합합니다.
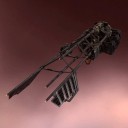
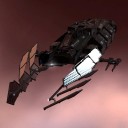
| Goku Manticore | |
|---|---|
 | - 프라이머리 쏘시면 됩니다. - FC의 지시에 따르면 됩니다. - 별도 지시가 없는 이상 Keep Range 2500m로 앵커하세요. -Bomb을 쏘고 난 뒤에 다시 앵커하는것 잊지마세요. |
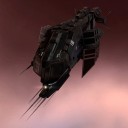
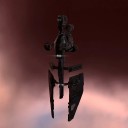
| Goku Nemesis | |
 | - 프라이머리 쏘시면 됩니다. - FC의 지시에 따르면 됩니다. - 별도 지시가 없는 이상 Keep Range 2500m로 앵커하세요. -Bomb을 쏘고 난 뒤에 다시 앵커하는것 잊지마세요. |
HNemesis나 Manticore에 탑승한 경우, 해당 속성에 보너스가 있는 다른 Bomb을 사용하시면 안됩니다.
Explosive타입 밤은 Exolosive레지가 높기 때문에 서로 같은 Bomb끼리는 터지지 않지만,
다른 속성의 Bomb이 섞이게 되면 해당 밤이 아군 전체의 Bomb을 삭제시켜버릴 수 있습니다.
Hound가 아닌 바머에 탑승한 경우 Bomb은 꼭 Shrapnel Bomb을 사용하시거나,
FC가 캐피탈 쉽의 캐퍼시터를 날리는 Focused Void 나 섭캡의 캐퍼시터를 날리는 Void Bomb을 요구할 경우
해당 Bomb을 FC의 요구에 맞게 가져가시는 편이 좋습니다.
Secondary DPS
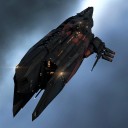
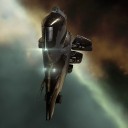
| AB Kikimora | |
|---|---|
 | - 프라이머리 쏘시면 됩니다. - 거리에 따른 총알 변경 오더 따르세요. - 적 파이터를 갈아버리는 함선입니다. 브로드캐스트 순서에 따라 파이터를 삭제시키시면 됩니다. |
(AB 하피 플릿에서는 주력 DPS입니다.)
| AB Fleet Harpy | |
|---|---|
 | - 프라이머리 쏘시면 됩니다. - 거리별 총알 변경 오더 따르세요. - 키키모라보다 장거리 교전에 용이합니다. 키키모라와 동일하게 브로드캐스트 순서에 따라 파이터를 쏘세요. |
Logistics
“TEST_LOGI_ONE” 채팅 채널에 들어가 있어야 합니다.
워치리스트 총 15칸을 알차게 채워야합니다. 채팅 채널에 보통 Primary WL, Secondary WL 등
워치리스트에 올려놓아야할 사람들을 적어놓습니다. 보통은 커맨드쉽들이 워치리스트에 올라가게됩니다.
남는 공간은 다른 로지 친구들을 넣으시면 됩니다.
쉴드 브로드캐스트가 올라오면 브로드캐스트창에서 CTRL+좌클릭으로 아군을 락인합니다.
락인되는 동안 F1 F2 F3 을 눌러 모듈이 깜빡거리게 만들면 락인되는 동시에 로지를 줄 수 있습니다.
로지가 끝난 아군은 CTRL+SHIFT 좌클릭으로 언락하면 빠르게 언락 할수있습니다.
| AB Fleet Scalpel | |
|---|---|
 | 로지 채팅 채널에 들어가 있어야 합니다. 죽으면 로지 채팅 채널에서 나가세요. 쉴드와 아머 브로드캐스트가 보이도록 설정하세요. Mindflood는 로지FC가 사용하라고 하거나 큰 싸움이 시작되면 사용합니다. FC에게 2500m 킵 레인지로 앵커하세요. |
| AB Fleet Kirin | |
 | 로지 채팅 채널에 들어가 있어야 합니다. 죽으면 로지 채팅 채널에서 나가세요. 쉴드와 아머 브로드캐스트가 보이도록 설정하세요. Mindflood는 로지FC가 사용하라고 하거나 큰 싸움이 시작되면 사용합니다. FC에게 2500m 킵 레인지로 앵커하세요. |
플릿에 최소 15대의 로지 파일럿이 있어야 탱킹이 수월하게 가능합니다.
Tackle
주로 고쿠 플릿에서 인터딕터는 헌터의 역할을 수행합니다. DPS 플릿 전체가 적의 널섹으로 향하는 헌팅 웜홀 앞에서 대기할 때, 인터딕터는 헌팅 웜홀로 들어가 적 성계를 뒤져서 로콸, 캐피탈, 슈퍼캐피탈 등을 찾고, 버블을 펴 태클한 뒤 클로킹 모듈을 잘 활용해 백업 태클과 아군 DPS 플릿이 들어올 때까지 태클을 유지하며 살아남는 것이 주 목적입니다.
| Fleet Sabre | |
|---|---|
 | - FC의 오더가 없는 한 아군 플릿에 버블 펴지 마세요. |
| Fleet Flycatcher | |
 | - FC의 오더가 없는 한 아군 플릿에 버블 펴지 마세요. |
| Instalock Stiletto | |
 | - FC의 오더에 따라 정찰하세요. ( 간단한 영어 할줄 아셔야 하고 마이크 있으셔야합니다.) |
Support
Default
Used in almost every fleet
| AB Fleet Stork | |
|---|---|
 | - Provide Shield Boosts - Ask FC before booshing - Anchor on the FC and follow aligns |
| AB Fleet Bifrost | |
 | - Provide skirmish boosts - Ask FC before booshing - Anchor on the FC and follow aligns |
| AB TP Hyena | |
 | - Paint/web targets - Orbit FC at 2500m and follow align commands |
| AB Fleet Crucifier | |
 | - Split tracking disruptors on DPS near your name alphabetically |
| AB Fleet Keres | |
 | - Point the primary - Orbit FC at 2500m and follow align commands |
| AB Fleet Kitsune | |
 | - Jam enemy logi near your name alphabetically |
| AB Fleet Sentinel | |
 | - Neut targets FC calls - Orbit FC at 2500m and follow align commands |
Situational Support Ships
서포트 함선
상황에 따라 FC가 요구할 수 있는 서포트 쉽들은 여기에서 열람할 수 있습니다.
상황에 따라 FC의 재량으로 위 함선들을 요구할 수도 있습니다.
FC의 요구에 따라 언제든지 해당 함선을 제공할 수 있도록 MWD/AB 리핏이 빠르게 가능한 해당 함선들을 준비해 놓는 것이 좋습니다.